|
Final
touch before painting
Before I send this case to the paint shop (my garage) there
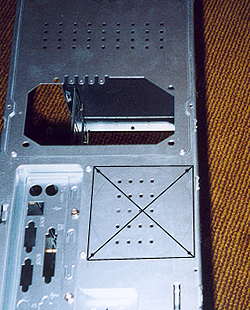
is still some metal work to be done. First, I added a blowhole
in the back of the case, just behind the CPU. The biggest fan
that could fit in there was a 92mm one, so that's what I used,
which was graciously supplied by Nerdsbyte.
In the following picture, you can see the marks I used for it
(you will see the final results at the end of this article).
Read Part 1
of this article for detailed instructions on making a blowhole.

The
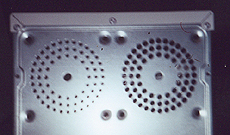
case I used has two places to mount 80mm fans, at the top back.
In my original review
of this case, I complained that the holes, which were there
by default, were not big enough to let the fan breathe. I simply
enlarged those holes with my drill until I got them as large
as I wanted. Since I use low output fans from Sunon in there
(30cfm) this is enough. But if you use high output fans, you
may want to cut a big hole instead and use a chrome fan guard,
this would give you the best results. On the next picture you
can see the before (left) and after (right) appearance.

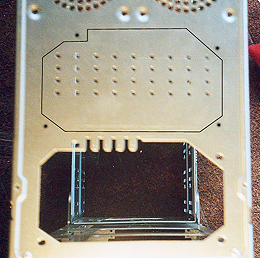
One
last thing I want to add (or should I say remove?) is a hole
in the back of the case so I can fit a second power supply.
This hole may be a little bit more difficult to cut due to its
irregular shape, but it's still the same basic rules as doing
a blowhole or window. Measure, measure, mark, cut, and pierce.
All the cuts where done with a jigsaw except the diagonal edges.
The jigsaw is not a good tool to cut angles like those so I
used a dremel.

Next
>>
<<
Part 1
|