|
Installation
The
installation of a CPU is usually the easiest part of almost
any upgrade although it does help if you have the manual for
your motherboard handy as running into problems could well require
you to look up a few settings. The system I had decided to upgrade
is as follows:
Intel
VX Pro Chipset
PentiumMMX-233Mhz
CPU @ 75Mhz Bus (O/C to 266)
64Mb-66Mhz
EDO Ram
24x
IDE CDRom
2x2Gig
HD's
16Bit
Soundcard (SB32)
Matrox
Millenium2-8mb
The
system mentioned is my fathers computer from work and knowing
him the word 'backups' means very little, so we were under extra
stress to get things right. The installation manual was very
useful and in following the steps the first thing I had to do
was boot the system and do a diagnostic using the enclosed floppy
disk. A few minutes later and the set-up showed me that it didn't
have a bios update for my system, however we weren't worried
so I hastily exited the program and shut things down ready for
the hardware.

Now
as things go this system happens to be about the most up to
date PentiumMMX Board that Intel produced for the Socket7 line
and so we very much doubt a Bios update would have been needed
anyway. The system itself was already Y2K compliant as well,
or so previous testes would have us believe. Either way a hasty
removal of the OLD CPU was no problem and now came to installing
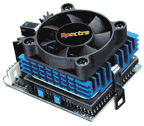
the new one. We lined up the pins and moved the CPU down into
position; it was now that the first problem arose. The universal
problem with motherboards is that people only make them to support
specific hardware and so sometimes you get space problems. In
this case a group of batteries and transistors lay in the way
of pressing the bulky kit hard into the slot. Thankfully we
were able to move these aside just enough for the processor
and it's mount to sneak into position and get locked in.
Next
>>
|